Web Admin
Introduction
This page provides insights for administrators and developers of ANIS. Not users of the client interface
ANIS offers an API to configure instances or projects. Again, configuring through a web interface is often easier. A web interface is provided to configure the instances visible for users.
This web interface assists the administrator in the configuration. This page describes how it works.
Authentication
As said in authentication, keycloak is used for authenticating users of the app.
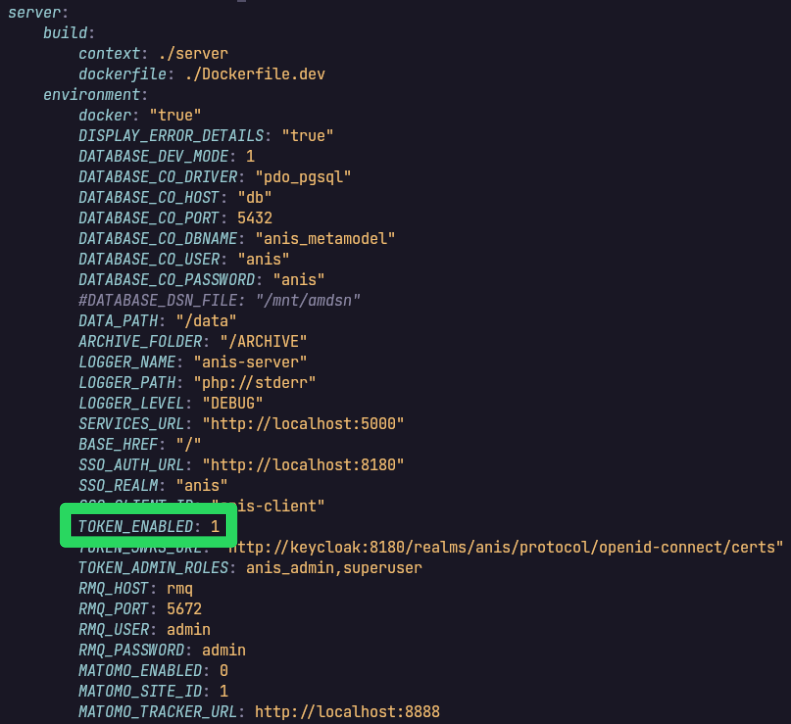
The authentication is controlled by an environment variable in the server container.
In production, you should set it, but in development mode, the latter authentication can get in the way for fast prototyping.
ANIS is already configured to work with keycloak depending on the provided setting.
You activate and deactivate authentication using the TOKEN_ENABLED environment variable setting in the server container, please have a look at the docker-compose.yml for this.
Note: if authentication is set, an administrator user is provided via the keycloak configuration.
The latter user has cesamsi@lam.fr as a username and its password, admin.
You can obviously create new administrators if necessary via the keycloak configuration, please refer to the authentication guide for further information.
Warning: to access the administration interface, you need to authenticate or the latter should be disabled in development mode.
Web interface
Assuming you enabled authentication, and authenticated as an administrator, you can open the web administration interface in development mode. Please, click in the Admin button on the upper right in the navigation bar.
You should get to a page like the following. The main entry point to the app configuration and settings.
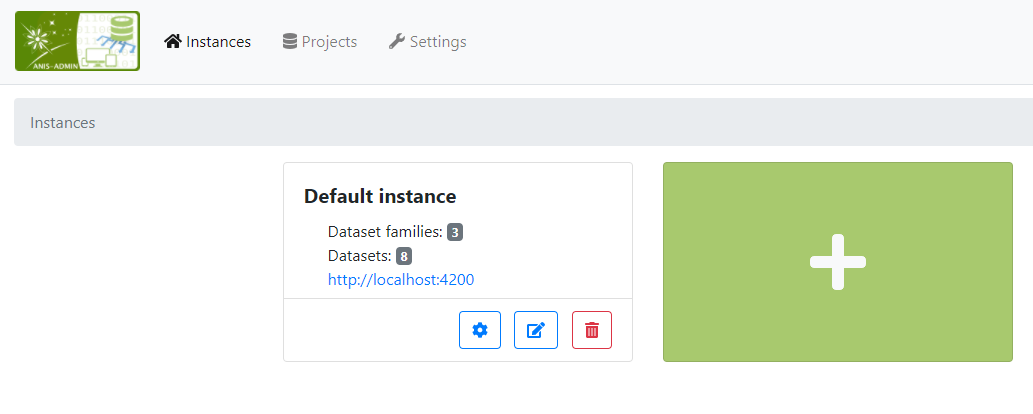
On the first page you can see the list of available instances.
Here you can see the default instance provided by default on first build.
The default instance refers to one anis-client project run in development mode on http://localhost:4200.
On the card menu you can see five buttons, in order:
- instance settings (gear): to configure the datasets and webpages in the instance
- instance edition (pencil): to configure the instance intrinsic properties themselves
- instance design (paint palette): to manage the general appearance of the instance
- instance export (file export): to export the instance configuration
- instance deletion (bin): to delete the instance itself, an irreversible operation
The green + card menu enables to create a new instance from scratch.