Installation
Introduction
This page describes the steps to follow to install the software locally on your machine. The examples provided works on a Linux system.
The source code of ANIS is a monorepo projects that contains a server, a client, some services and some tasks. The following sections details the steps to install the previous stack.
Git repository
The ANIS source code is available on a public gitlab repository. You can retrieve the ANIS project by cloning the official git project.
$ git clone git@gitlab.lam.fr:anis/anis.git
$ cd anis
Docker & docker-compose
ANIS works through docker containers. Each part of ANIS, the server, the client, the services and tasks runs in four respective containers.
In the development mode, ANIS provides a docker-compose file that allows the management of containers (start, stop, restart, logs, etc).
You can find the docker-compose.yml file at the root of the project. It aims to list all the containers necessary for the operation of ANIS.
To operate, ANIS needs, with the four preceding containers, four other containers:
- keycloak: Authentication and access management software.
- postgres: Database management system used to install the configuration database and the test business database.
- rabbitmq: Message-broker software used to launch asynchronous tasks.
- maildev: Software used to send or receive emails in development mode.
Makefile
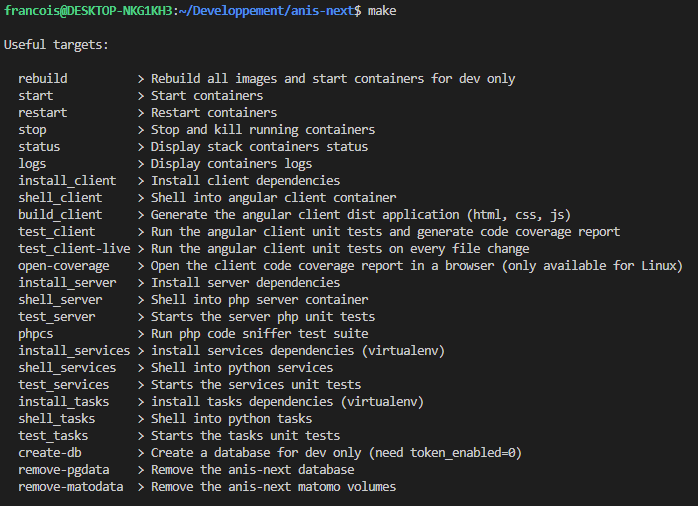
ANIS contains a Makefile that helps the developer to install and start the app.
The latter Makefile defines command line interface shortcuts for docker commands used to manage the different latter containers.
Just for information, to list all available operations just type make in your terminal.

Warning: if you encounter problems with file permissions, check in the Makefile the UID and GID variables.
The UID and GID must match your user and group. By default the UID and GID is set to 1000:1000.
Dependencies
Install client dependencies
The client part is written with Angular/TypeScript and requires dependencies to work. To install type this make command:
$ make install_client
The client dependencies packages will be downloaded and placed in a folder named client/node_modules. This may take a few minutes.
Just for information, you can find the list of dependencies in the client/package.json file.
Install server dependencies
The server part is written with PHP and requires dependencies to work. To install type this make command:
$ make install_server
The server dependencies packages will be downloaded and placed in a folder named server/vendor. This may take a few minutes.
Just for information, you can find the list of dependencies in the server/composer.json file.
Install services and tasks dependencies
The services and the tasks part are written in pure python. The dependencies for the preceding are installed upon first build normally.
You can still install specified dependencies using the commands:
$ make install_services
$ make install_tasks
Data
To works, ANIS needs an associated with a data directory. This directory stores files associated with scientific projects and datasets.
With the development version, you can download a compressed directory with examples files. To install them, please type the following command:
$ cd ..
$ wget https://anis.lam.fr/files/anis-data.tar.gz
$ tar xvf anis-data.tar.gz
$ rm anis-data.tar.gz
At the root of the project you can see a symbolic link to the directory you just downloaded: data.
Start the app
You can now start the ANIS stack. To do this use the following make command:
$ cd anis
$ make start
This command uses the docker-compose.yml file to create and launch the different containers needed.
This may also take a few minutes. You can see the status of ANIS containers by typing the following command:
$ make status
You can also follow the containers logs by typing:
$ make logs
Warning: just wait a few seconds for the software to start to continue this procedure guide.
Databases
To work, ANIS need at least two databases:
- One database to store the app configuration, the metamodel database
- At least one database containing datasets, the business database
In the development version, two ready-to-go databases can be created. To create them type the following command:
$ make create-db
ANIS is ready to use!
Server
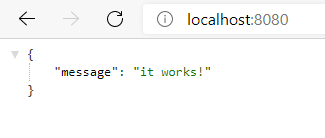
- The server API is available at the following address:
http://localhost:8080

You can find in the following a few examples to query the server:
- To list all instances configured and available:
http://localhost:8080/instance
- To list all datasets available and configured within the default instance:
http://localhost:8080/instance/default/dataset
- To print all data for the observations dataset with column 1, 2 and 3 configured within the default instance:
http://localhost:8080/search/default/observations?a=1;2;3
- To count number of data available for the observations dataset configured within the default instance:
http://localhost:8080/search/default/observations?a=count
- To print only 3 observations data (search by id) from the observations dataset configured within the default instance:
http://localhost:8080/search/default/observations?a=1;2;3&c=1::in::418|419|420
Client
- The web-ui client is available at the following address:
http://localhost:4200and you can start using the app with the test data.
Services
- The services are available at the following address:
http://localhost:5000